How to Take Great Photos of Your Property
The old saying ‘a picture paints a thousand words’ is something of a cliché, but like a lot of clichés, it contains a sizeable element of truth. When you’re trying to get people interested in your property – whether you’re selling it or renting it out – the right photographs accompanying any listing can go a long way toward attracting attention and highlighting the positive aspects of a house or apartment. In the past, many people might have placed the task of photographing their property in the hands of a professional, but a couple of technological developments have changed this. The first of these is the fact that the average smartphone or tablet now has a camera capable of capturing professional quality images with ease. In addition to this, and perhaps in response to this quality, many people now make use of social media for recreational or professional purposes, or perhaps even a combination of the two, and are therefore extremely well versed in the art of choosing, editing and uploading images. Bearing this in mind, and also considering the fact that no professional photographer will know your property as well as you do, the sensible choice seems to be to take your own photographs and save a considerable amount of time and money. Get it wrong, however, and you could end up badly damaging your chances of achieving a sale or a let, and the following tips could go a long way toward helping you create the kind of impression that will have interested parties flocking to check out the reality.
Take a Step Back
If you live in your property all the time or are exposed to it on a regular basis, there’s a very strong chance that you’ve started to take some things for granted. This can mean good things or bad things, from a fantastic view off a balcony to an overly cluttered kitchen. Familiarity can stop you noticing the kind of aspects that will catch the attention of a first time viewer, so it’s vital that you take a step back and look at the property as if you’re seeing it with fresh eyes. If you find this difficult, ask a friend to take a look for you, and point out the selling points and problems which you’ve become all too used to. That way, when you’re taking your photographs, you can deal with (or completely ignore) any problems and focus on the stand-out details that make your property unique.
Exterior
People often forget to take pictures of the exterior of a property, but images like this can play a large part in selling the place as a whole. On the simplest level, they will make it easier for people to find the property when they come to view it. On top of this, exterior shots offer the chance to show off appealing features like balconies, a garden, pool or terrace, although it should go without saying that you have to make sure any repairs or maintenance needed has been carried out before taking your photograph. Even a relatively minor issue like a fence which needs painting will prompt viewers to wonder what other aspects of the property might have been neglected. The final benefit of an exterior shot is that it can help to create an impression of the ‘feel’ of the area the property is in. When location plays such a large part in determining the property choices which people make, the fact that your property looks like it’s surrounded by leafy avenues or vibrant suburbia – to choose two possibilities at random – might be the factor which tips the balance in favour of your listing.
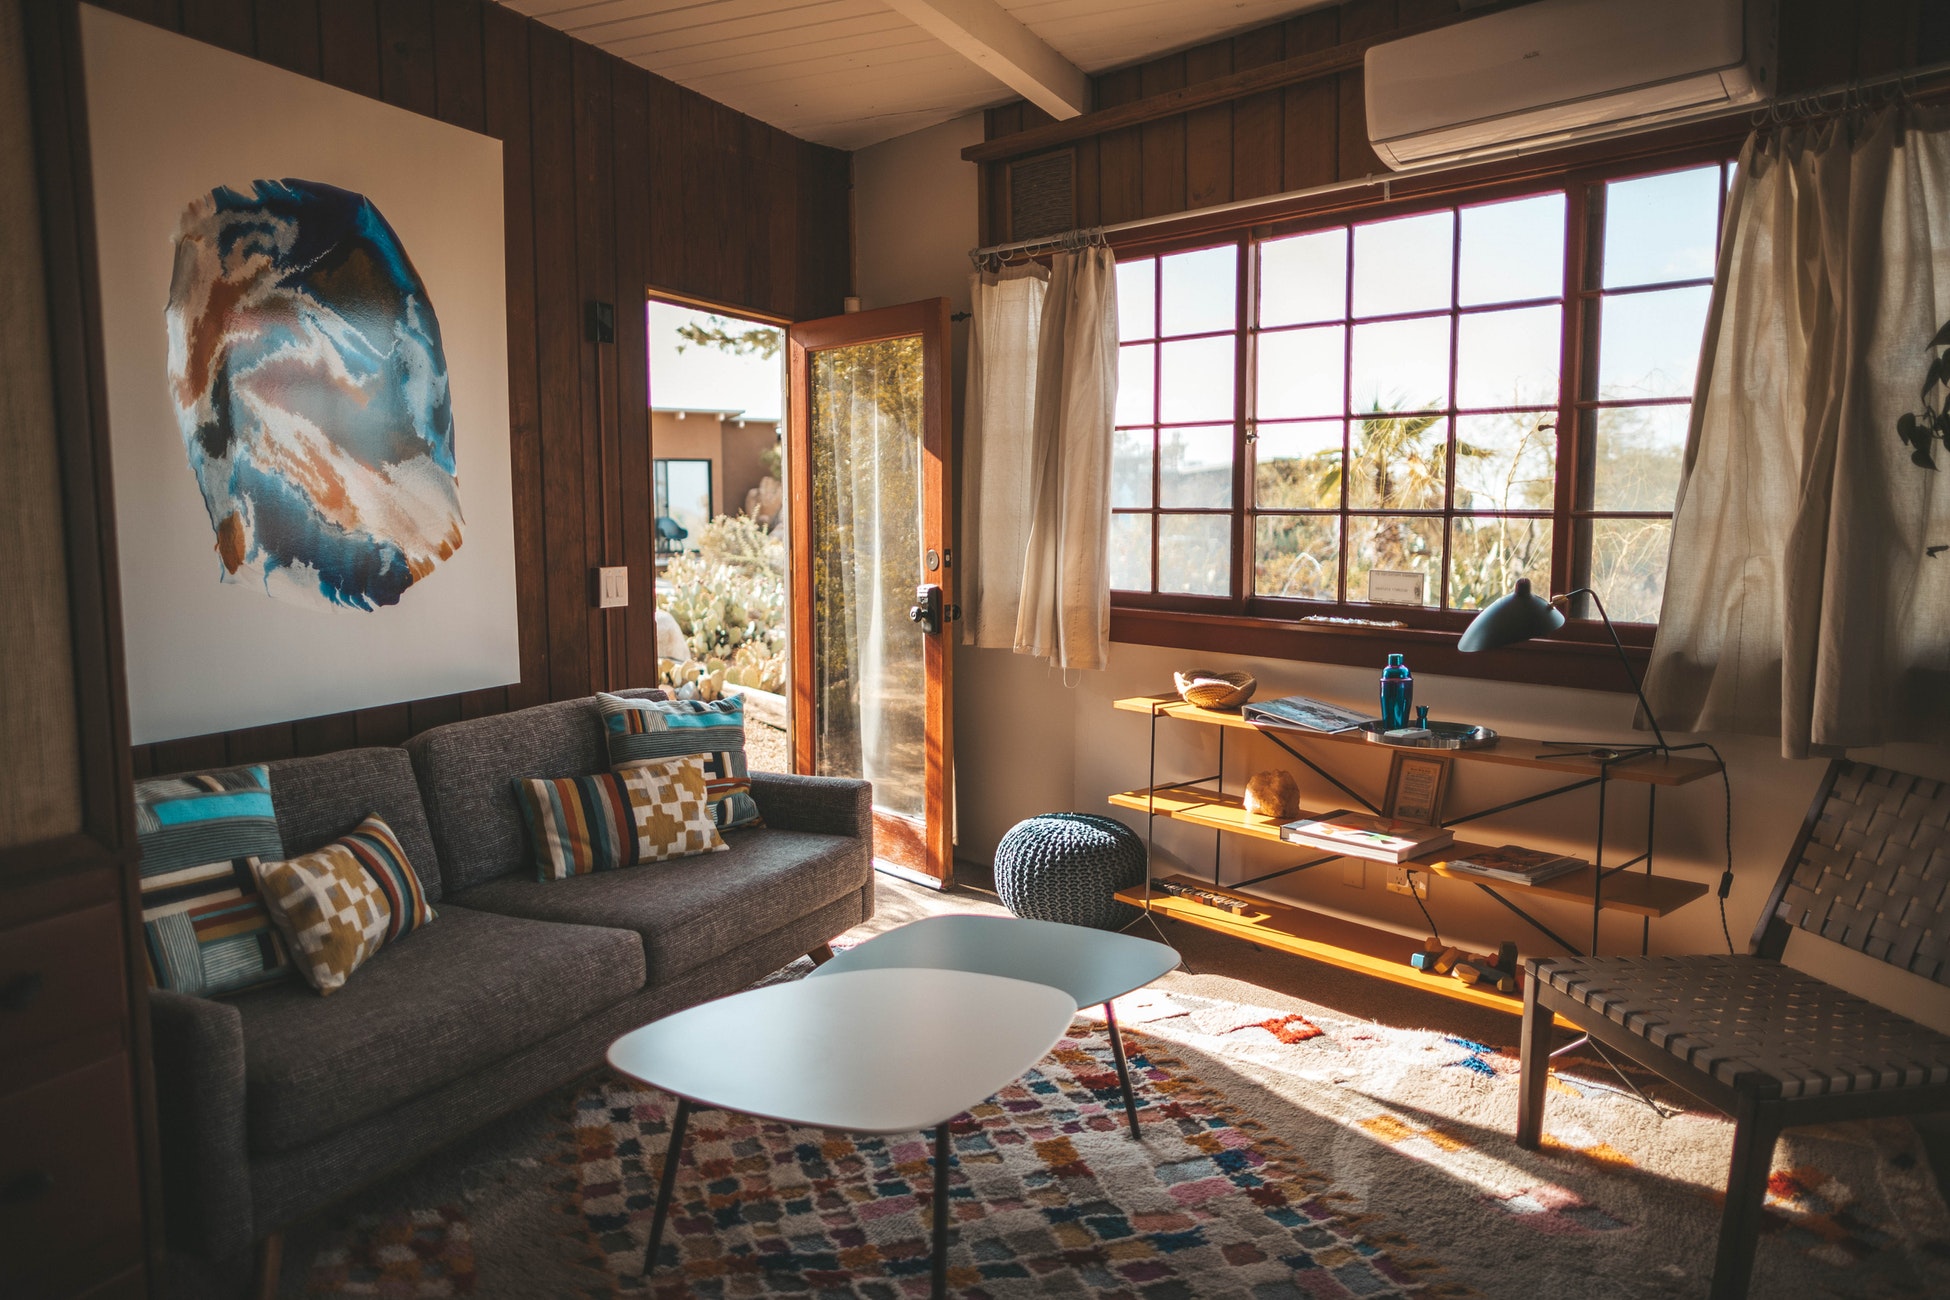
Lighting
The better the light you have to work with, the better your photographs will look, so make sure you take them during the day and with all of the shades, curtains or blinds open to allow in maximum daylight. If need be, use any lighting within your property as well, although you should check the images as you take them to make sure that the camera is set to take advantage of the light without the images being too bright. If the photographs are too bright then colors and objects will appear ‘washed out’, and that’s why the best time of day to take your photographs will be during the so-called ‘golden hour’, which is the name given to the hour following sunrise or before sunset, when the setting or rising sun offers lighting which is strong but subtle.
Staging
Another vital practicality involves staging the photographs you take. In simplest terms, this means going over the rooms you photograph with a fine tooth comb and making sure they look as tidy as possible. You might not notice a stray shoe sticking out from underneath a chair, a crumpled rug or a wilting pot plant, but these are the kind of details that will jump out from the images. The other aspect of staging involves setting up small visual cues as to how the rooms will be used by someone living there. Simple props like a couple of glasses of wine on a kitchen table, a candle flickering on a mantelpiece or matching cushions on a sofa can make the difference between a property which looks like a house, and one which people will be able to imagine as their home. An additional tip which can help create an overall ambiance, rather than presenting a set of entirely separate images, is to pick an individual color such as a warm red or subtle charcoal grey and have it picked out using items such as furnishing or ornaments in different rooms.
Angles
Don’t trust your eye alone to decide what the best angle for each room is. The camera will often capture things differently to how they may appear at first glance, so it’s safest to take photographs from all corners of a room, capturing every angle and deciding after which one gives the best impression. One of the key plus points of digital photography is the virtually limitless number of shots which can be taken and stored, and you should take advantage of this to build up the largest possible library of images to choose from.
Connections
When you go from room to room taking photographs, try to position the images so that the photographs connect the individual spaces. The right edge of one space, for example, could be visible along the left edge of the next image, giving anyone who looks at the photographs as a sense of taking a journey through your property as a whole, rather than simply looking at isolated areas. Creating this kind of impression can also be aided by including shots which feature spaces such as hallways, corridors, and staircases, which link the property together.
Format
Taller rooms may seem to cry out for a portrait style treatment, but most screens are now designed to maximize the impact of landscape images, so take your photographs horizontally rather than vertically whenever this is feasible. Landscape photographs will show off the rooms in your property to the best effect when viewed on a smartphone, laptop or tablet.